Did you know that mismatched moldings can significantly decrease your historic home’s worth?
Antique trim molding restoration goes far beyond good looks — you’re preserving the soul and value of your historic property. Most decorative and elaborate molding profiles disappeared from mass production years ago, now requiring skilled professional millworkers. This creates real challenges for homeowners who want to maintain or restore the historic profiles that make their older homes special.
Finding the right match for old house trim feels daunting at first. Historic millwork damaged by rot or mold often can’t be saved and must be replicated by experienced craftsmen. Costs vary widely — stock profiles run $3–$12 per linear foot while custom milling ranges from $10–$30 per linear foot, plus extra charges for specialty woods and custom knife work.
Modern technology has changed how we tackle historic crown molding restoration. Craftsmen still match profiles by hand, but many now use advanced digital tools to create precise 1:1 recreations. Professional millwork teams replicate pieces in their workshops using CAD technology for perfect matching.
This guide walks you through identifying, sourcing, and installing period-perfect trim that honors your home’s architectural heritage. Whether you’re restoring one room or tackling a whole-house project, we’ll help you work through the complexities of antique trim molding with confidence.
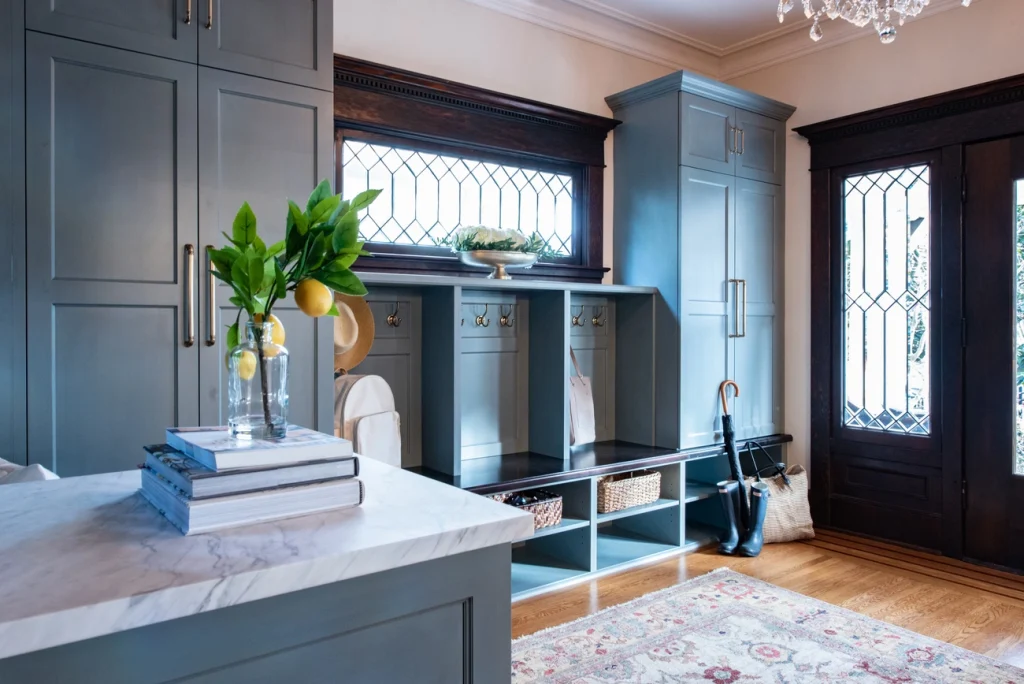
Understanding Antique Trim and Historic Molding Profiles
Moldings have always served two essential roles—practical function and visual appeal. They cover imperfect transitions between building materials while creating the visual interest that tells your home’s unique story. These architectural elements hold the key to understanding your property’s heritage.
What makes trim ‘period-perfect’?
True period-perfect trim combines historically accurate profiles, proper proportions, and correct placement. Early colonial America’s frontier homes showed minimal decoration by necessity. The country’s growing prosperity changed molding preferences dramatically.
Craftsmen hand-carved every piece before 1850, making moldings expensive symbols of status and taste. Machine processing after 1850 opened new possibilities, allowing wider use and bold design experiments that made quality moldings available to more homeowners.
Period-perfect trim respects your home’s architectural DNA while boosting its historical worth. Mass-produced modern substitutes break the visual story your house has been telling for generations. Authentic trim follows the proportional and decorative principles that master craftsmen established centuries ago.
Common types of historic crown molding and baseboards
Historic homes showcase several essential molding categories:
- Baseboards: These floor-level strips finish wall bottoms and shield them from daily wear. Baseboards grew taller as dado rails disappeared, balancing the visual weight of soaring ceilings.
- Crown molding: Wall-to-ceiling transitions that add height and elegance to any room. Crown profiles blend concave and convex curves that catch light beautifully throughout the day.
- Dado rails: Georgian homes featured these protective strips about 90 centimeters up from floors, originally saving walls from dining chair scuffs and scratches.
- Picture rails: Upper wall trim that once supported hanging systems for artwork and family portraits.
How old house trim reflects architectural styles
Every architectural era left distinct molding signatures. Greek Revival homes (1825-1860) displayed wide trim bands and substantial door casings that echoed classical temple designs. Victorian and Queen Anne styles (1880-1910) celebrated ornate layers with towering baseboards and intricate carved details.
American Craftsman style (1905-1930) embraced simpler, geometric patterns with natural wood finishes that highlighted grain beauty. Colonial and Federal periods established timeless proportion rules, often featuring fluted pilasters that borrowed from Greek and Roman architecture.
Regional differences add another layer of character. New England Colonial homes developed detailed crown moldings while Southern properties used wider baseboards suited to formal rooms with impressive ceiling heights.
Upgrade Your Home with Local Experts!
Forget the impersonal experience of big box stores. Our skilled craftsmen are ready to install any custom flooring, stairs, and trim you need – from hardwood to tile and beyond. Proudly serving Vancouver, Portland, Camas, Ridgefield, and surrounding areas.
Finding and Matching Historic Molding
Finding the perfect match for your antique trim molding starts with the right techniques and resources. Preserving architectural integrity takes both detective work and skilled craftsmanship.
Profile jigs and tracing tools get the job done
Capturing your existing molding’s exact shape comes first. A profile jig (also called a contour gage) handles this task perfectly. This affordable tool—costing $10-$15 at most hardware stores—contains movable pins that lock against your molding. Press the jig against your trim, let the pins conform to the contours, then trace the resulting profile onto paper. This traced template becomes your reference for matching stock profiles or ordering custom millwork.
Stock profile sources worth checking
Home centers and specialty lumber yards maintain catalogs of historic profiles. Many suppliers offer historically accurate molding collections designed specifically for period homes. Some companies stock over 65 historically accurate profiles representing Early American, Georgian, Greek Revival, Federal, and Colonial Revival styles. These authentic reproductions match moldings commonly found in 18th and 19th century homes throughout the Middle Atlantic and New England regions. Always bring your traced profile or a small sample of original molding for direct comparison.
Custom millwork: when stock won’t work
Custom milling becomes necessary when stock profiles don’t match your historic molding. More expensive, yes, but this option ensures architectural authenticity. The process involves providing a mill shop with your traced profile or molding sample to create a custom knife. Your chosen wood species gets milled to match the profile exactly. Many millwork specialists maintain libraries with thousands of profile options—some with over 4,000 different designs. Custom grinding of new knives handles truly unique profiles.
Wood species and finish identification tips
Correct identification of your molding’s wood species ensures authentic matching. Examine growth rings on end-grain to confirm solid wood versus manufactured material. Consider weight, hardness, color, and grain pattern. Quartersawn white oak shows distinctive flecks that help with identification. When matching finishes, look closely at undertones and layers. Many historic finishes combine multiple elements: dye stains, oil-based glazes, and shellac or varnish topcoats.
Preparing for Installation: Tools, Materials, and Planning
Proper preparation makes the difference between a frustrating project and a successful restoration. We’ll guide you through the essential steps before any cutting begins.
Measuring and documenting existing trim
Accurate measurements are critical for perfect reproduction. Create detailed sketches and take photographs from various angles for reference. Use a thin cardboard or wood template to record the exact profile shape. Mark stud locations while removing old trim to make reinstallation easier.
Choosing between restoration and replacement
Your existing molding condition determines the best path forward. Minor damage responds well to wood filler or epoxy. Extensive rot, warping, or structural issues require replacement. Keep in mind that removing original materials permanently eliminates historic value.
Organizing trim by room and profile
Number each piece according to its location as you remove it. Draw a room mockup on graph paper to track measurements and label corners in advance. For large projects, start with a small room first to estimate material requirements and timeframes.
Safety tips for working with old materials
Safety comes first when handling historic trim. Homes built before 1978 likely contain lead-based paint. Avoid sledgehammers or aggressive removal techniques that create harmful dust. Use small pry bars for careful extraction, and consider consulting EPA-certified professionals for testing or encapsulation.
- Wear proper protective equipment
- Work in well-ventilated areas
- Keep work areas clean and contained
- Dispose of materials according to local regulations
Installing and Blending Antique Trim Seamlessly
The real artistry comes during installation — seamlessly blending new trim with historic elements takes specialized techniques that go well beyond basic carpentry skills.
Techniques for aging new trim to match old
Creating weathered character in new wood trim makes all the difference for authentic restoration. Age new wood naturally with these proven methods:
- Apply iron vinegar solution (steel wool soaked in white vinegar) to cedar for instant graying
- For pine, apply black tea wash first, followed by iron vinegar
- Use commercial gray stains like Benjamin Moore Arborcoat for predictable results
You can also try Pioneer Wood patina for a barn-door style or Minwax Weathered Oak for a soft gray tone with gold grain highlights.
How to replicate historic finishes
Matching century-old profiles starts with testing finishes on scrap boards first. For lighter tones, pre-wash boards with water before applying thin stain — this creates subtle aging effects. Applying different stain colors in layers builds more authentic depth.
Avoiding common installation mistakes
The biggest mistake we see in older home projects? Using generic modern materials that clash with original design and durability standards. Poor measurements cause ill-fitting joints and gaps that scream “amateur work”. You need to account for wall imperfections with shims, or visible gaps will appear between trim and uneven surfaces.
When to hire a professional for complex profiles
Some projects call for expert help — elaborate crown moldings like those in Georgian-style homes demand specialized skills. Complex profiles requiring specialized equipment, historically significant restorations, or custom millwork needs typically justify bringing in professionals who understand both the craft and the history.
Let’s Create Your Perfect Historic Space
Preserving your historic home’s authentic character through period-perfect antique trim molding takes attention to detail, patience, and the right approach. We’ve walked through how proper identification of historic profiles serves as your foundation for successful restoration projects. Each architectural period tells its own unique story through distinctive molding styles.
Finding the perfect match for your home’s original trim presents real challenges. Armed with profile jigs, careful measurements, and knowledge of the right resources, you can achieve remarkable results. Whether you choose stock profiles or custom millwork depends on your specific circumstances and budget.
Preparation stands as the most critical phase of any trim restoration project. Meticulous documentation, proper labeling, and safety precautions with potentially hazardous materials save countless headaches during installation.
The true artistry emerges during installation, where aging techniques and finish matching turn new materials into seamless extensions of your home’s historic character. Historically accurate molding does more than please the eye — it preserves your property’s architectural integrity and value.
Professional assistance proves worthwhile for complex profiles or whole-house renovations. Specialists who understand both historic carpentry techniques and modern technology ensure your trim restoration honors your home’s architectural heritage while meeting today’s standards.
Ready to restore your home’s original character?
Let’s bring those historic details back to life!
Your historic home deserves trim that tells its authentic story. We take time to research, plan carefully, and execute with precision. The resulting beauty and historical accuracy will reward your efforts for generations to come.
More Helpful Tips:

Hardwood Floor Damage Prevention: How to Spot and Fix Common Issues Before They Cost You

Laminate vs. Hardwood Flooring: Pros and cons to help you choose the right flooring for your home

Humidity Control for Hardwood Floors: The Essential Guide to Prevent Cupping and Gapping

How Long Does Hardwood Refinishing Last? Maintenance Tips for Portland and Vancouver's Climate

Water Damage to Hardwood Floors? Our Restoration Process for Vancouver Homes